Dress the bones
An image put on a bone is a piece: it follows the bone. Drag each image of Pip onto its bone, from the back to the front.
Drag and let go
- Press Ctrl+1 to fit the skeleton in the canvas, and open the tab Images.
- Drag a thumbnail onto its bone and let it go there. The image stands as it is drawn, whichever way the bone points, and its centre is where you let go.
- When the image belongs off the bone (the head is wider than its bone), let it go on the bone, choose the new piece in Pieces of the right panel, and drag it into place with the Move tool (W): with a piece chosen, the tools move the piece and not its bone.
Each piece is drawn over those put before it, so put them on from the back to the front:
| Image | Bone |
|---|---|
| tail.svg | tail 1 (all of the tail: the next chapter bends it) |
| ear.svg | ear back |
| arm.svg, thigh.svg, shin.svg, foot.svg | arm back, thigh back, shin back, foot back |
| body.svg | chest |
| thigh.svg, shin.svg, foot.svg | thigh front, shin front, foot front |
| head.svg | head |
| ear.svg | ear front |
| eye.svg | head |
| arm.svg | arm front |
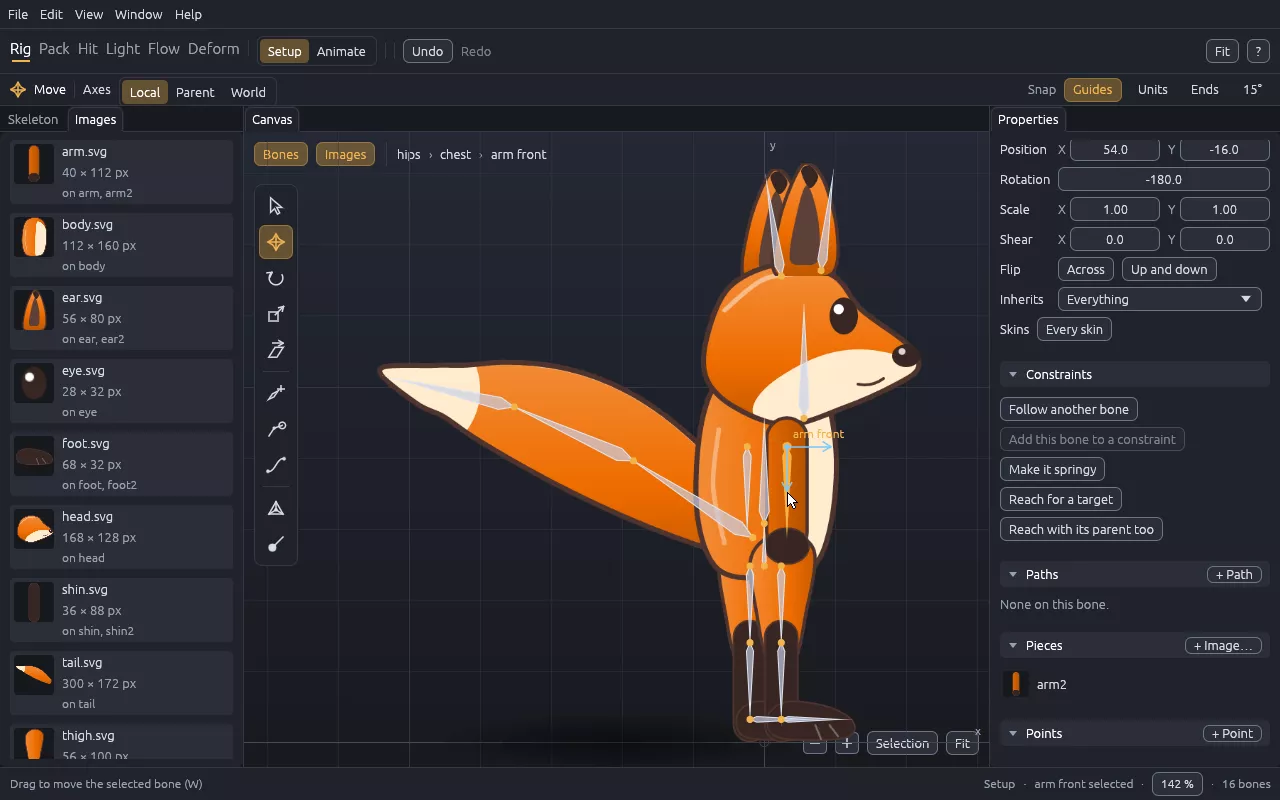
A piece in the wrong place in the order: To front and To back, in the panel of the chosen piece. Its Colour tints it: a darker one for the limbs behind gives depth.