First steps
Build the application, open an example, and learn the parts of the window. The chapters after this one follow the work: a skeleton, its images, what moves by itself, the animation, and what a game is given.
Build and run
pantin is not released yet: it is built from its source with a Rust toolchain. From the root of the repository:
cargo run --release -p pantin-appThe first build takes a few minutes. A project can also be named when the application starts:
cargo run --release -p pantin-app -- examples/fish.pantinOn Linux the window needs the libraries of the desktop, which a desktop system
already has. On a bare one, install libxkbcommon-x11-0 and a Vulkan or OpenGL driver.
The start screen
With no project named, pantin opens on its start screen, over the window. On the left, Start: a new project, one to open, the layers of a PSD or a skeleton exported as JSON to import; Recent: the projects you opened lately, each with its folder; Learn: the tour, the shortcuts and the documentation. On the right every example plays in a card of its own, which names the one thing it is made to show (a mask, a sequence of images, overlap…): click one to open it and see how it is made; the examples says what to look at in each. A click beside the screen or Esc closes it on an empty project, and File › Start screen… brings it back later.
The tour
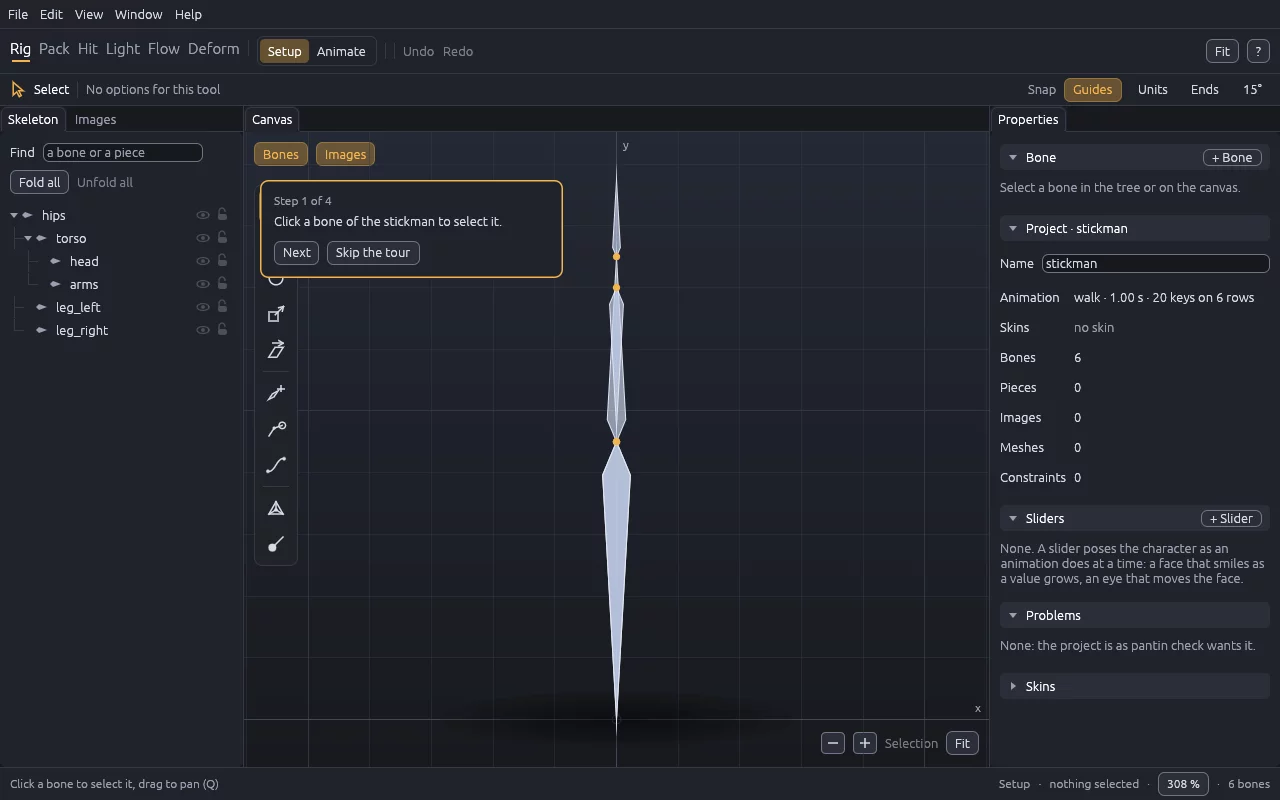
The first time, pantin takes a short tour on the stickman, one step at a time: select a bone, turn it, switch to Animate and set a key, then play the walk with your key in it. Skip it if you like; ? (or F1) opens the shortcuts and the first steps, and takes the tour again.
The parts of the window
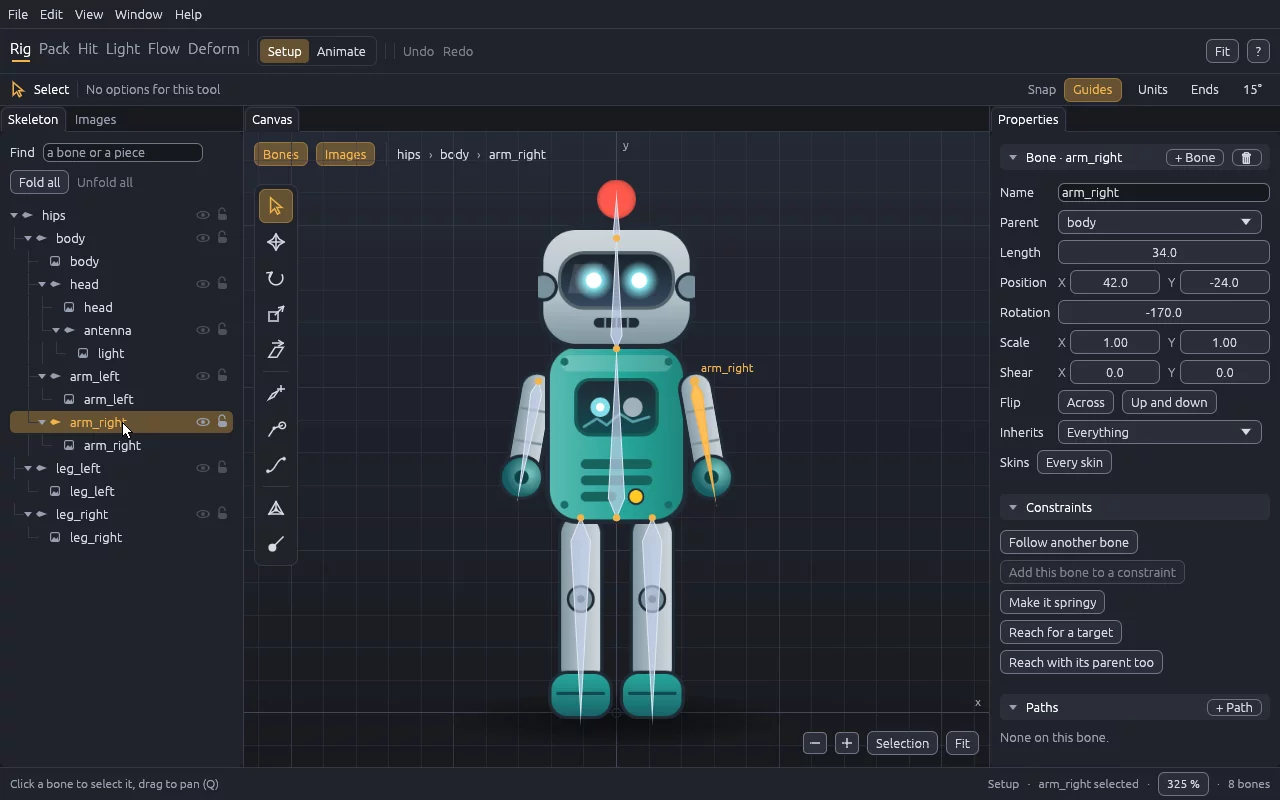
- The menus, on the first line: File, Edit, View, Window and Help.
- The bar: the workspaces as tabs (Rig builds and animates, Pack makes the atlas), the two modes Setup and Animate (Tab), undo and redo. Under it, the tool in use and its options; what it does is said in the line at the bottom.
- The toolbox, down the left edge of the canvas, as in Blender or Photoshop: each tool an icon, its name and key under the pointer. In a short canvas it takes two columns.
- The left panel: Skeleton, the tree of bones and their pieces, and Images, every image file of the project.
- The viewport, in the middle. The wheel zooms where the pointer is; the middle and right buttons pan, and so does the left one with the Select tool. Fit shows the whole character. In its lower right corner, - and + zoom, Selection frames the selected bones; when only a part of the character is in view, a map in the lower left corner shows where you are, and a click there looks elsewhere.
- The right panel shows the selection only: the bone, its constraints, its pieces, the piece that is chosen; with nothing selected, the project.
- The timeline, at the bottom in Animate mode.
Each panel is a tab, as the canvas is: drag one by its name to another edge or beside another tab, or out into a window of its own, or across a whole side of the window (right click on its name). Setup and Animate keep a layout each, kept for the next run; Window shows or hides each panel and Reset the layout puts them all back.
Words
An image is a file, a PNG or an SVG; an SVG stays sharp however far the canvas zooms
in. A piece is an image put on a bone. A project is a folder whose name
ends in .pantin, with a manifest (pantin.toml), the skeleton and its
animations (rig.json) and the images; its format is
written down. A new project takes the name of the folder it is first saved in.
Every change is one step of undo, for the whole project: Ctrl+Z undoes, Ctrl+Shift+Z redoes. A drag is one step.
To learn by doing, Build Pip makes one fox from an empty project to an exported walk. This manual says what each part does, one at a time.